Monday 21 January 2013

TAOP Part 3 Colour - Exercise 2 - Primary and Secondary Colours

TAOP Part 3 Colour

Exercise 2 - Primary and Secondary Colours

This exercise is about finding a scene where each is dominated by one of the primary colours or the secondary colours.

The primary colours are red, yellow and blue. The secondary colours are termed, per the course notes as green, violet and orange. 

The secondary colours can be created by mixing two of the primary colours, and tertiary colours can be created by mixing adjacent primary and secondary colours. 


The following images contain a scene dominated by one of the primary or secondary colours. In taking these images I've used bracketing to under and over exposure by 2/3 stop (+0.7  or - 0.7) from the initial camera metered setting as this is a quicker process than working in manual mode as per exercise 1 and so easier to create the same frame when the camera is hand held.  Again all images are unprocessed jpgs out of the camera

Image Set 1 -  Red

I've tried in this image to use a macro lens and focus on a red peppers seeds understanding the small depth of field of the macro lens wide open will blur the red of the pepper to help focus the viewer on the colour and not the pepper. With hindsight the DOF is to small and I should have attempted a small focus stack set of images. Alas the pepper has been eaten but I like the natural colour of the red pepper so have continued to use the image.

This image normal exposed appears the closer to the Colour wheel primary Red


This image is under exposed by 2/3 of and is a close match


This image is over exposed by 2/3 of and is also close in colour to the primary red


Image Set 2 - Yellow

This a lemon taken against a background of my gym shorts in natural light. Out of the 3 images I've chosen the camera auto metered image as that closing matching the yellow in the colour wheel however I feel the metering may have slightly been fooled by the dark background and perhaps has very slightly over exposed. 


This is the  2/3 stop under exposed image


This is the 2/3 stop over exposed image


Image Set 3 - Blue

I've been struggling to find something blue that might be a different and avoids the blue house front door so I tried a picture of my trainer with a small DOF focused in the middle of the trainer to add depth to the image and I have given the camera a cheeky and jaunty tilt to help it have an advertising type of look. Looking at the trainer sole (the different shades of blue contrast well) I've taken the image 2/3 stop under exposed. The under exposure bring the trainer's sole a bit darker and close match of the primary blue colour


This image is over exposed by 2/3 of a stop


This image is normally exposed, per the camera


Image Set 4 - Green

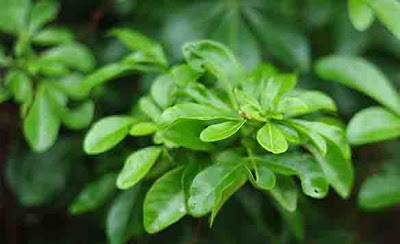
This image is taken outside and in the rain of bush that has retained its leaves during winter. I've felt that this under exposed image (-2/3 of a stop) of the shrub's leaves matches best the secondary colour green in the colour wheel.Variations in the colour green are evident here both due to the light and the older and new leaves of the plant. I expect also some raindrops on the leaves will also reflect light adding to the variations


This is the camera metered and exposed image, which is a bit too light


This image is over exposed by 2/3 of a stop and is also too light 


Image Set 5 -  Violet


This image is of an Orchid and the colour best matched the violet of the colour wheel above using the under exposed image, though the back lighting of the orchid's petals does cause some colour variation for each petal.

This is the camera metered "correct" exposure


This is 2/3 stop over exposed image


Image Set 6 -  Orange

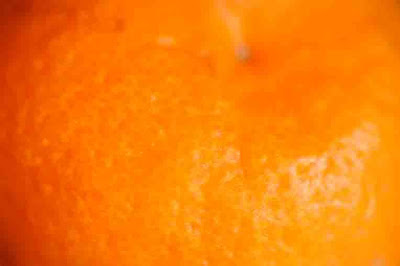
I found this a difficult colour to match to its secondary colour on the colour wheel. Constructing this image I had the brainwave of using a satsuma on top of bottle and used a macro lens to make an almost abstract image but I think there is enough there for viewers to see that it's a fruit. As you can see in this image, and here using a spherical object, the light falling on the subject can vary its colour. This image is the camera metered exposure over exposed by 2/3 of stop.
Having this colour fill the frame for these 3 images looking at them on a cold day  makes me feel surprisingly warm


This is the  2/3 stop under exposed image


This is the camera metered normal exposed image


Exercise Learnings

a) I hadn't really considered that under or over exposure can alter a colour's strength and this exercise really does enforce this

b) Scrolling quickly through this blog quickly and seeing the primary and secondary colours does strangely give me an indescribable lift in terms of the colours and change moving from one to the other. What a dull world it would be if all colours were dull and muted

c) Nature's colours clearly have a purpose of attraction and interestingly this also works in infra-red at certain wavelengths, based on the visible wavelengths that insects / animals see things

d) I have not specifically thought of colours when taking photographs but its clear even from this exercise how colour can give impact to simple images where to a degree the object becomes less important and the colour of more importance



Saturday 19 January 2013

TAOP - Assignment 2 - Tutor Feedback

TAOP - Assignment 2 - Elements of Design

Tutor Feedback

 I always get a good feeling of anticipation waiting for my assignment feedback and I know that there will elements of feedback and critique that if I take on board I can improve my photography understanding and the photographs I produce.

Firstly I have attached a link to the location within my blog that contains the images I submitted together with my annotations though the actual assignment was presented to my tutor as part of a pdf document:

I've not detailed all the feedback there is enough here for anyone else to get a flavour and also importantly for me to have easily available for continual reflection and learning. I'm comfortable sharing this.. I wonder if I will feel the same if my submission is below expected quality.....I will endeavour not to submit work like this :) 

Overall Comments
Yet again a well-delivered assignment, the professional manner that the work is presented is a delight to assess and I look forward to receiving material of this quality. The work holds together well and shows the maturity of your approach and a natural progression on the course.
This is reassuring that I'm on the right track in how I present my assignments


Feedback on assignment Demonstration of technical and Visual Skills, Quality of Outcome, Demonstration of Creativity

The well-presented PDF format shows that you care about your work and its presentation.
The whole collections of elements of design are well considered and executed,
Using the desaturated effect on the collection of images provides’ glue’ that holds even unrelated images together.
A strong body of work has potential to re contextualise the images and produce an exhibition or book.
Although this work is yet to break into such lofty heights, it is certainly on its way.
There is specific feedback on some of images which I'll examine toward the end of this post

.......... As I stated this is a strong collection of images that hold together in many ways, the commitment to a strong desaturated and contrast quality works very well and with improvements in capture and post production cropping.


I'm very pleased with this feedback and though the assignment meant a collection of different images I'm pleased that my attempts to create a collection of images rather than a presentation of just individual images has worked

Learning Logs or Blogs/Critical essays

You are showing a strong development of your practise, please ensure that with all
communication a link to the blog is made, please this helps access your work easier.
Yes, a school boy error; I had forgotten to include in the document a link to my blog.
 A good example of a need to focus on the small things as well as the big things

The annotation that has supported this submission, shows that you are taking on board the 
principals and this is very good, this will be more useful as you are moving through the 
course, critical analysis of your work is extremely important, Understanding your work is 
especially important as you progress. It is important to acknowledge where you have 
produced something very strong, but also that you acknowledge when an image you submit 
is not as strong and identify the issues, this is mature learning.
This is good feedback and I do try to give my thoughts about how I have captured and 
presented the image. I will attempt to be more critical of my images and also try to present 
images that I have not selected on blog / and or exercises so that my tutor can see as well as 
read some of my decision processes.

Suggested reading/viewing /action
It is now that I believe more knowledge and use of Photoshop would benefit your work, from 
what I see you are already producing very good post production, but this requires practice, 
consider using a wacom tablet if you do not have one already. Photoshop provide many 
tutorials and there are many others providing free guidance, please explore these as you are 
well on your way.
I think as post processing will become a key part of my photography this is well worth
 investigating. Additionally getting into good habits using tools that will improve my work now 
will pay dividends in the future.

Pointers for the next assignment
Try and eliminate unnecessary elements and avoid distracting backgrounds, this will ensure 
your visual communication is clear. 
This is very valid and valuable feedback and there is sometimes a requirement to remember
 that a simple message is more easily seen and understood, There is sometimes a challenge
 in attempting to grab an image as opposed to waiting for a simple image to unfold in front of 
me or to simply change my POV. A reminder to myself...its digital photography so I should 
attempt multiple methods of capturing an image as this will give me the greater chance of 
creating a great image. I have been looking at images on Flickr and
www.luminous-landscape.com and the simple images are often the most powerful and 
sometimes most mesmerising.

Father Christmas has brought me some photography books with a little prompting:
 - Adobe Photoshop CS6 book for digital photographers by Scott Kelby
 - Photography: A cultural history by Mary Warner Marien
 - Professional Portrait Retouching Techniques by Scott Kelby
 - The Complete Guide to Black and White Photography by Michael Freeman

I'll need to create a specific location within my blog for my book reviews / comments when I've 
read them.

Tutor Feedback on some of my specific images:

Diagonals
This was my original image:
My tutor suggested the confused passenger may be a distraction which I agree with. Whilst it 
what have been better to have been more patient taking the image and to have eliminated 
this totally in the original image, some crop options are:

Elimination of the confused passenger


A further crop of the above image better accentuates the diagonal lines


WOW - doesn't this alter the image giving it much more energy. I think in future I will try to 
rotate the camera at the point of taking some images as again this gives me a greater 
number to look at post shoot and assess my objective and decide which image best fulfils it. 
Again its small simple changes that can give great impact. Looking at my original submission 
this is so much better.

Pattern
This was the image I submitted, I've detailed below it my tutor's feedback


"Rhythm: the choice of the factory behind link fencing was qualified by your annotation, 
however there could have been better selection of aperture so that the foreground was not 
as much in focus, this would have added a sense of rhythm across the image, alternatively 
you could have used the fast aperture (f4? Or ideally f2.8) and focused on the chain link 
fence, that may have been a rhythm pattern?

The chimneys on the building could have been used as you stated, however a long lens 
would be required to isolate them as elements." 

This is good feedback and instead of focusing on one aspect I've tried to include both and 
confused the message that I wanted in the image. If I could go back and retake this I would 
but using the wider aperture as suggested. However if you see my original annotation you will 
see that I got politely told off by a security guard. The repeating lesson here is to take 
multiple images creating images slightly differently, whether its framing, aperture, shutter 
speed, or point of view (POV). Especially so in this case, and I suspect other images to come 
in that I wont get a second chance to go back.

My tutor's feedback has been invaluable to me and its given in key bite-size examples and 
elements that allow my to focus on them rather than being overwhelmed with a lot information 
and critique.

Summary
So in summary I feel I am learning more and I have been putting some elements into my
 images, mostly these are remembered at the time of taking the image. If I can introduce a 
few more elements this will again progress my work.

At the time of writing this I have progressed well through the Colour exercises but its in time to 
hopefully be remembered and included in photograph submissions for the Colour Assignment


Monday 14 January 2013

Infrared Photography

Infrared Photography

I have a Nikon D70 that has been converted to infra-red and has a 680nm IR filter.

Whilst this camera can be used to great effect on hot sunny days seeing a cloudy sky with clouds back lit by a setting sun in January made for an interesting image as seen by the eye.

However given that I'm working my way through the Colour exercises I thought I would have a quick experiment with the IR camera. Ideally the images should have been taken on a tripod but the light appeared to be changing quickly so they were taken hand held outside my front door and it was also raining.....it was just an experiment after all

Image 1


This is the in camera processed jpeg. For infra-red photography its normal to set the white balance differently to an ordinary camera. This I have done in the past using sunlit green grass rather than am 18%  grey card


Image 2


This is the same image but in this case this is RAW and will exactly what the sensor captures with no White Balance adjustments made, either by the camera or myself


Image 3


This is also the same image, its the RAW file as per Image 2 above and here, though making no white balance adjustments I've switched the red and blue channels, a common technique used for processing IR images.

Image 4


This is image 3 converted to mono

So 4 IR images exactly the same but with different colours creating a different feel in each image. I really like the cloud structure that the camera has captured and the very simple processing changes demonstrate this in different ways

I intend to experiment further with infra-red photography and if possible I would like to include some images as part of one of my exercises or assignments.

Let me know what you think and if perhaps you have also experimented with iR photography

Monday 7 January 2013

TAOP Part 3 Colour - Exercise 1 - Control the Strength of Colour

TAOP Part 3 Colour

Exercise 1 - Control the Strength of Colour

The purpose of this exercise is to demonstrate that through the manual control of camera exposure, colour can be controlled. I've used a Poinsettia for its vibrant red colour; note for this exercise I've looked to capture colour and not consider other framing elements that I would normally. These images below are all unprocessed jpegs straight from the camera. I have not used any RAW files

Image 1


This is the base position starting in aperture priority at f/5.6 with a camera set shutter speed of 0.5 seconds. Understanding this is the camera set exposure I will for the next set of images set the camera to manual, the shutter speed to 0.5 seconds then alter the aperture from f/5.6 to a wider aperture to over expose and a smaller aperture to under expose.


Image 2


In this image I have over exposed  manually setting the the exposure 1 stop below my known perfect exposure setting the aperture to a wider setting of f/4


Image 3
The exposure is now 1/2 stop under at f/4.5


Image 4 

The aperture increased now to f/6.3 to be half a stop under exposed than the camera measured perfect exposure in image 1


Image 5


This image has been taken one stop under exposed using again a smaller aperture of f/8 with a fixed shutter speed


Concluding this exercise I now have 1 image correctly exposed (image 1), 2 over exposed images (2 and 3) and 2 under exposed images (4 and 5)

Exercise Observations

The over exposed images begin show the colour red a little washed out and weaker than the correctly exposed image getting weaker as the image is under exposed by the wider aperture.  The two under exposed images show the colour red starting to get richer and darker and perhaps more concentrated.

In my personal view of the images taken, image 4 half-stop under exposed is still close to a good exposure but the others in this instance appear to under or over exposed.

Michael Freeman describes in his book "The Photographer's Eye" exposure as being able to alter a colour's strength, its saturation.

Chris Rutter in his book "the essential Color Manual for photographer's" p 128 suggests under exposing images taken in winter by one or 2 stops to help combat snow appearing grey and drab since the camera's exposure may have been fooled by the colour of the snow and tries to expose it as a grey colour. 

Through previous experience I've also found that using a polarising filter can also strengthen colours within an image, in addition to help reducing light reflections on water