Friday 29 March 2013

TAOP - Assignment 3 - FEEDBACK

TAOP - Assignment 3 - FEEDBACK

I've not copied in all my feedback but have detailed below a summary with my comments:


Overall Comments


The excellent manner that the work is delivered and presented shows the commitment to the module and a great understanding of the theory reinforced by the production of a strong collection of images that are very well executed.
An exceptionally well-annotated Blog gives an indication of how you are progressing and records the learning process and demonstrates a mature approach to the academic aspect of the process. 

WJ Comments - I'm very pleased with the feedback. I do need to ensure I remember my photography and not become solely focused on the assignment that this element suffers

Feedback on assignment
  
The delivery and completion of your work is extremely well paced and is of a very high standard. With the restrictions of short days and poor weather the choice of predominantly still life for this assignment works in your favour and shows an intelligence of what is possible to deliver at this time. This maintains a very good structure that prepares you to progress quickly and effectively.
There are a wide variety of subjects and these for fills the brief that requires a chance of subject to stretch your experience and provide a good collection for a portfolio as well as the fulfilment of the brief. 

Within the collection of images there are some notable ones that deserve special comment:
WJ Comments - I've not detailed all my tutor's comments:


Colour Harmony through complimentary colours, using what you identify as a ‘well known snack’ (Whatsit?) you have created an image of great power, using abstraction, and a well observed eye.
The image shows the printed detail and is reminiscent of the work of Roy Lichtenstein, who currently has a wonderful retrospective exhibition at the TATE modern, intentional or not it is great to see inspiration found from such work.
  
The use of a macro lens and the limited depth of field characteristics have been particularly successful in a number of images and those are predominantly the more successful aesthetic creations. The Lemon & Lime in what looks like a gin and tonic is a very appealing image on many levels.

The back-lit lemon slice with green background is also a notable image that works. It may have benefited by a silver/mirror reflector adding additional highlights on the foreground of the lemon, it seems that you have got some subtle highlights already, but when working at this scale it is difficult to execute and you have done well with this.

WJ Comments - This is a good idea and one I shall remember. I do have a reflector but as does happen in the exercises / assignments sometimes that I focus too much and forget some of the simple elements. I will remember this

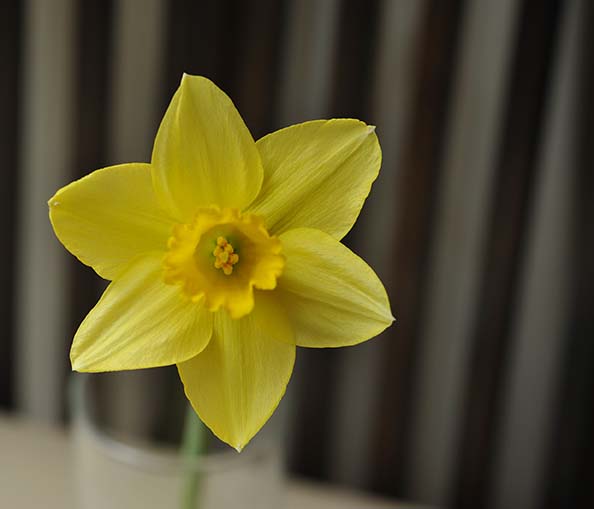
The use of flowers for an assignment such as this is a natural choice but the choice of fresh pristine flowers is not usually seen, so again, attention to detail and selection of appropriate subject is to be commended.

The choice of a naked flame shows a creative and innovative approach to the work, but although well executed the large expanse of black dominates the image and there is far more subtle colours within a flame, it is a strong image and a very difficult subject but I feel that more control of this would have produced a stronger image.
WJ Comments - I was initially think of the flame in contrast to blackness but in hindsight I should perhaps have focused entirely on the flame and the two colours

This assignment is about colour and you have great evidence of understanding, however there are a few images that are not as aesthetically successful. These are the landscapes, which both seem to be a great contrast to the other material but as subjects are been forced into answering the brief. It is perhaps wishing to have variety that dictated the inclusion of these, but I feel that as the majority of the macro and still lives are very successful, you may agree that as a body of work they are the weaker images.
WJ Comments - I agree entirely I was torn between continuing with macro and filling the brief. I should in hindsight have kept the subject matter and produced the images as a set

The Hand & orange is well executed but may benefit from closer cropping or a different ratio as the dark of the sleeve tends to distract, these are small points, and should not be taken as major issues.

This is the original:


This is with a tighter crop:
This removes the distracting black sleeve and makes the orange much more dominant in the image. I've amended the crop so that the orange is not dead centre, I recall this from earlier exercises :D


On the whole a well executed assignment.


Feedback on assignment Learning Logs or Blogs/Critical essays Context
  
The learning Blog is a very important part of this assignment and yours is very good, however it maybe that you should start to look at what are your weaknesses within a group of images and how you could improve. Your own critical judgement is a skill that is very important as you move forward, it is a difficult thing to do especially in a medium such as a BLOG

WJ Comments -  I do try to think about what I've done for each exercise and detail this in my blog together with what I've learnt. I'm now getting more comfortable with this process and will endeavour to critique my weaker images and detail why I think they are weaker


Suggested reading/viewing Context
  
To be aware of the quality of flower still life photography, I would suggest the work of Carol Sharp and other photographers to be found on the Association of Photographers website.


This is also a great resource for future assignments as the photographers are amongst the worlds best and the benchmark for many aspiring to work in a very competitive but rewarding arena.

Sunday 17 March 2013

TAOP - Light - Measuring Exposure

 Light - Measuring Exposure

Part One

Below are 6 images that I've produced deliberately above or below the camera's measured exposure. For this exercise I've set the camera to Aperture priority, which is what I would normal select. I've then adjusted the shutter speed by using a faster shutter speed to make the images darker or a longer shutter speed to make the images lighter.

Whilst its possible to use the camera in shutter priority and adjust the aperture to lighten or darken images this may impact the depth of field.


Image 1


Using f/8 and allowing the camera to meter the church only, it calculated a shutter speed of 1/500. When I metered the sky it calculated a shutter speed of 1/640. I've taken this image using the faster shutter speed if 1/640. The resulting image is of a perhaps slightly darker church but the cloud is not washed out and the shape of the cloud can be seen. This is because the faster shutter speed has allowed less light to reach the sensor.


Image 2


Using f/8 the camera metered a shutter speed of 1/400, I've then metered specifically for the tree and being darker its reduced the shutter speed to 1/250, a slower shutter speed has allowed more light to reach the sensor and has allowed an overall lighter image.


Image 3


Using f/8 the camera has metered which made the sky blow out very slightly. I've metered for the sky then set the shutter speed to a slightly faster speed of 1/250 which has slightly darkened the sky and overall image.


Image 4


With an aperture of f/8 the camera has metered a shutter speed of 1/400 likely as a result of the contrast between the light sky and the dark branches of the tree. I've reduced the shutter speed to 1/250 which has allowed more light to reach the sensor and has lightened the bark on the tree trunk.


Image 5

Again with an aperture of f/8 the camera has metered a shutter speed of 1/125. I've taken the image and looked at it on the camera screen and thought I could darken the tree using a faster shutter speed and create a darker frame for the river. I've used a shutter speed of 1/160.


Image 6

This is an infra-red image taken using single spot metering which I've taken of the sun just before sunset. By metering the sun the foreground hills and trees have been put into silhouette. I've swapped the blue and red channels to create the colour in this image 

Part Two

Each of the following images have a camera measured exposure followed by images 1/2 stop and one stop under exposed and 1/2 stop and 1 stop over exposed. Here I'm using a consistent shutter speed as originally measured by the camera and then setting the camera to manual and using a consistent shutter speed as originally metered and adjusting the aperture

Image Set 1
All taken using a tripod due to the metered slow shutter speed

Average exposed - f/8 at 1/20


Half stop under exposed - f/9 at 1/20


One stop under exposed - f/10 at 1/20


Half stop over exposed - f/7.1 at 1/20


One stop over exposed - f/6.3 at 1/20


Of this set I prefer the image taken 1/2 stop over exposed as the lighter colour of the yellow contrasts well against the darker background. I've made this image bigger so its easier to spot.


Image Set 2
Images in this set have been taken with a camera converted to infra-red with a 665 nm filter, and the final image has had the blue and red channels swapped.

Average Exposed - f/8 at 1/400


1/2 stop under exposed - f/9 at 1/400


1 stop under exposed - f/10 at 1/400


1/2 stop over exposed - f/7.1 at 1/400


1 stop over exposed - f/6.3 at 1/400

Of this set I prefer the image taken 1 stop over exposed as as the cloud structure is more visible. This was an overcast day and infra-red is more often used in sunny bright conditions. However it maybe a feature of infra-red that I consider taking images 1/2 to stop over exposed in future under these conditions.

Image Set 3
I've converted the images in this set to black and white to see how light affects images without colour

Average exposed at f/8 and 1/250


Half stop under exposed at f/9 and 1/250


One stop under exposed at f/10 and 1/250


Half stop over exposed at f/7.1 and 1/250


One stop over exposed at f/6.3 and 1/250


In this set I prefer the mono image 1 stop under exposed, as this image in black and white seems to have a greater range of tones. I suspect the average metered image in this camera to perhaps be slightly over exposed to start.


Image Set 4

Average exposed at f/8 and 1/100


Half stop under exposed at f/9 and 1/100


One stop under exposed at f/10 and 1/100


Half stop under exposed at f/7.1 and 1/100


One stop under exposed at f/6.3 and 1/100


In this set I prefer the image 1/1 stop over exposed, since more of the brickwork in the foreground is exposed and the texture of the brick more visible.


Image Set 5
In this set of images I've again used a converted infra-red camera and swapped the red and blue colour channels.


For some reason the swans remained fairly static in this set either through furious paddling or perhaps at the point they were it was shallow enough to stand

Average exposed at f/8 and 1/60


Half stop under exposed at f/9 and 1/60


One stop under exposed at f/10 and 1/60


Half stop over exposed at f/7.1 and 1/60


One stop over exposed at f/6.3 and 1/60

In this set of images I prefer the camera metered exposure as there seems to be a better balance between the exposure of the water, land and sky.


Image Set 6

Average exposed at f/8 and 1/250


Half stop under exposed at f/9 and 1/250


One stop under exposed at f/10 and 1/250


Half stop over exposed at f/7.1 and 1/250


One stop over exposed at f/6.3 and 1/250

Whilst all the images appear a little washed out in this set I think the best image is the one under exposed by one stop; the colours appear more in line with what my eyes saw

Exercise Learning

a) Using a single point for camera exposure readings can allow you to expose exactly for the subject as opposed to an average scene metered reading. Different tonal contrasts within the scene can result in the camera creating an exposure you aren't seeing with your eyes or an exposure you simply don't want

b) Exposure can be controlled in aperture priority and shutter priority. However controlling exposure with the aperture may impact the depth of field subject amount of aperture change / or your visualised image

c) Digital photography is more cost friendly to "hedging" your image bets. In capturing a scene, if time allows making multiple exposures with slight differences may give greater options though it should also be recognised that using RAW files and adjusting the exposure or even adjusting an image's levels also in post processing may allow for the subtle differences to be made. However as always its better to try and get the image right in the camera. 

d) Spot metering within an image can allow the photographer to be creative when creating images. A good example of this is silhouettes, both creating them and avoiding them

e) Bracketing images also allows the photographer greater options and increase their chances of getting the correct exposure. The Photographer always needs to be aware that the camera's sensor sees / captures images a little different from how our eyes perceive the subject / scene