DPP Assignment 2 - Seeing Like your Camera
Now that I have my tutors feedback I will present this in green text and my comments etc in red
It’s interesting that this assignment is about seeing like your camera since it’s the camera’s inability to see like the human eye that I need to take account of. Our eyes are able to look around a scene and adjust sensitivity based on elements within the scene. The camera will record a dynamic range subject to the sensor’s sensitivity, and the camera’s exposure and light sensitivity settings.
Of course our clever eyes and clever mind can be easily
fooled, there are many optical and colour illusions that call fool our
sometimes simple mind. I’m told that the human eye with 20/20 vision and a 60
degree angle of view can resolve the equivalent of a 52 megapixel (mp) camera.
This is interesting as pro rated cameras such as the D800 are starting to
achieve resolutions near this. A single glance from the human eye and its
recording resolution between 5-15 mp can be immaterial as the eye and mind will
record elements that it regards as of
key interest. The human eye can see over
20 f/stop equivalents and is constantly adjusting as it scans the elements
within the scene.
Of course even if a camera can record levels matching the
human eye the final image produced may not be one of interest if the imagery
isn’t memorable. This is where the photographer needs to use their creative
skills and understand the limitations of the camera. These limitations can also
be used in a creative way.
The key difference for me is that the human eyes, well their
owners, will examine a scene and focus on the elements it finds interesting.
When creating an image the photographer may need to consider that the viewer’s
eyes will be restricted to the captured image and that their eyes will examine
only the recorded scene.
Prior to the recent set of exercises I have performed I was
aware of elements such as dynamic range, ISO and exposure adjustment but I had
never really thought about my requirement to learn how to see like the camera.
As my understanding improves I hope I can translate this in to reading of
scenes in front of my camera and the image I capture.
I have recently bought a book called Practical HDR by David Nightingale. HDR imagery is something I
would like to explore and I understand that HDR images are not appreciated by
all. I recall reading that Michael Freeman published a book regarding HDR but
completely misunderstood the application that photographers would apply to
creating HDR images and many chose instead to be very creative in the final HDR
image rather than to create a record of scene with a wider dynamic range than
what the camera’s sensor can record. Michael himself was surprised how many
photographs sought to create images. I’m not sure if HDR is still as popular as
it was when first explored and I think Photography can go through fashions. For
anyone playing the electric bass guitar or listen to music from the 80’s they
may recall the fashion of the “slap” bass playing style, Mark King of Level 42
a noted player of slap. This style has faded and perhaps HDR imagery has also,
likely only temporarily. I note the Nikon D4 camera now has a HDR setting, so
obviously professionals have a need for this. Using a camera’s ability perhaps
different from intended though is not a
bad things, understanding of facts allow creative interpretation. A key point
Nightingale points out is the need to meter the dynamic range of a scene, the
camera can help here with its histogram on its LCD.
One of the most famous photographers to have ever lived also
practised HDR with mono images. Here is an interesting article explaining this:
It’s interesting that Ansel used the water bath development
process for his black and white photography using 10 zones where zone zero is
pure back, zone 10 is pure white and zone 5 dead in the exposure middle. In a
future blog entry I will visit Ansel Adams in more detail. Ansel’s water bath
treatment allowed to expose the film emulsion saturating the heavily exposed
areas and less saturating the under exposed areas
I will look into this in more detail but a summary view of
Ansel’s application of the zone system was to identify in the scene that he was
to photograph was to identify the element of average light reflectance and set
the camera to expose for this. In the digital world of course this could still
result in some elements of the image being under or over exposed and will in part
be due to the dynamic range of the digital camera’s sensor.
Matrix metering will try to look at a scene and take the
average light reflectance across the scene and expose for this. Spot metering
will allow the photographer to correctly expose for a particular element of the
scene. This can be used creatively to say under expose a tree or building line
to put them into silhouette and perfectly expose a sunset or sunrise.
Understanding the dynamic range of a scene and the dynamic
range of the camera will allow the photographer to determine if he can
correctly expose the full scene. In the digital world the histogram on the
camera LCD is an invaluable tool. This allows the photographer through either
exposure compensation or using manual settings to correct expose to reduce
either over or under exposure.
So what happens if the scene still shows clipping on the
histogram. If with a tripod then taking 2 or more exposures ensuring each one
correctly exposes for low lights and high lights combining these images later
can created a HDR image. No tripod, then I could still take a a single image
and understanding that I can recover detail in shadow that I can in overexposed
highlights I would adjust my exposure to correctly expose the highlights and
understand I have greater chance of recover detail in the underexposed elements
of the image. In post processing using a copy of the first image and then
adjusting the exposure to correctly expose the under exposed elements of the
scene (standing a good chance of doing this) would then leave me 2 images one
correctly exposed for highlights and the other low lights I could then combine
to create a HDR image.
The digital world makes scene exposure much easier than in
Ansel’s film days however understanding his processes will certainly make my
understanding of DR and HDR that much better.
Alas for this assignment no post processing is allowed so I will be
limited to using the histogram to help me understand the scene I am
photographing and how the camera is dealing with the exposure.
Assignment Details
Submit
three images for each of the four situations that you choose. You will
need to decide the most appropriate metering mode and settings for
your camera. The aim is to get correctly exposed images straight out of
the camera, with NO post-processing, therefore the file format that you must
use is high-quality .jpeg, even if you normally shoot using RAW.
Overall Comments
You have
presented a technically very good assignment that is supported very well
through your technical based annotations and observations. The PDF file submitted
is structured well and gives good insight to your line of thinking. Your learning
log still needs improvement based upon the contextualisation recommendations
from the tutor feedback on Assignment 01.
Thanks for the comments, and yes I do need more contextualisation and academic research. I'm hoping that this will improve after this assignment. I do particpate in research but clearly I need to do more. What I also need to get better at is to document this and reflect on it terms of my understanding, knowledge gained, insight, and perhaps my view of how other photographer's work can influence my own
Feedback:
Demonstration
of Technical and Visual Skills
In this
assignment on ‘seeing the scene like your camera’ you have made some great
observations that are supported by a very competent technical language. Your
visual awareness is good, only perhaps some of your compositional considerations
could have been better.
In your
opening introductory statement there are some excellent observational skills and technical considerations made. Your
comparative study regarding someone with 20/20 vision and their perceived Mega
Pixel equivalency is quite refreshing. You made the comment about how the
viewers eyes will examine a scene and focus on the interesting part, this is
good, but what about a comparison on the human eyes seeing more like a HDR
video camera. Our eyes constantly adjust and adapt to the scene with our
irises/apertures compensating for the light changes. Have you put your camera
on ‘Live View’ and watched how it compensates for the scene. Still the comment
about knowing the cameras limitations and then using them creatively is a very
great visual awareness point. Well done…
Thanks for the comments and observations. I do use live view on my camera but often this is for focussing when using a macro lens. I have since tried this and yes, moving the camera around the scene does adjust the image as it looks to meter the scene subject to what the camera is pointing at, and whether I am using spot or matrix metering, but it does this much the same way as our eyes do
Your interior
shoots and the comparative to an estate agent photographer was
good to read,
some great points about the spaces and available light.
I think sometimes its easier to contextualise my work as if it was a photographic practice and in addition to the assignment challenges I sometimes also try to this as challenges as professional practitioner.
Part One
Choose a minimum of four situations from the
following models: -
1 .
Street scene in the middle of a clear, sunny day –
narrow streets and high buildings which cast deep, long shadows.
2 .
Indoor space in which the only available light is
strong natural window light.
3 .
Photographing people in the shade while the
background is in the sunshine e.g. a group portrait in the shade of a tree.
4 .
Early morning or late evening landscapes with
low-angle incident light.
5 .
Any backlit scene, whether in direct or indirect
light.
6 .
Scenes which include objects of very different
reflectivity, even in flat light such as an overcast day.
7 .
Indoor scenes illuminated by a single source of
artificial light of high luminance e.g. a desk lamp.
8.
A scene with strong incident dappled light.
For my assignment I have selected:
·
Indoor space in which the only available light is
strong natural window light
·
Any backlit scene, whether in direct or indirect
light.
·
A scene with strong incident dappled light
·
Indoor scenes illuminated by a single source of
artificial light
Indoor space in which the only available light is strong natural window
light
An
estate agent photographer would need to apply some thought when capturing
images of rooms within a house with a view to creating images that made the
rooms appear spacious, bright and clean. Challenges presented will be dynamic
range, exposure and subject to the amount of light within a room shutter speed.
I’ve deliberately not used a tripod so that I can challenge my knowledge and
its application to producing well exposed images and avoid any potential camera
shake being restricted to slow shutter speeds.
I’ve
decided for this first set of images to use auto white balance
Image 1
This
image is of a kitchen which has particular challenges of bright light through
window on left, white doors, dark floor and dark worktop and white ceiling. I
felt the dynamic range of the scene far too great for the camera’s sensor so
the choice was to consider correct exposure for the windows and doors which
would have left the room dark or to expose correctly for the dark elements of
the room and over exposure the window and doors. For house images I’ve felt it key to
correctly expose the dark elements of the room adhering to my self determined
brief above. I’ve also boosted the ISO to
640 limited by the widest aperture of my UWA lens at f/4. I’ve need needed to
compose the image excluding the window since the highlights would be completely
blown out because I’ve spot metered for the tiles at the end of the room. I’ve
also opened the door on the right so the edge is face on to the lens to help
avoid it dominating the image being over exposed. The challenges of the scene
are show in the histogram though I do have some highlights clipped, the low
lights are correctly exposed. The lighting from the window has created shadow
challenges, exposing for the floor would have washed out the cupboards and
caused more highlight clipping within the image.


Though post processing activities are not part of this
assignment options I would have considered would be taking a set of bracketed
images, noise reduction. For example
purposes only I have included a toned mapped only version demonstrating that a
potential tone mapped version restores detail captured in the floor but
slightly underexposed in my image above:

I would have used the above image for the estate agent picture rather
than the unprocessed image.
The kitchen scene
was an obvious shot of how the lighting needs improving, with that sweeping shadow
presenting a challenge.
Since this assighnment I took this further as a technical exploration and have produced a blog entry for this which can be found here:
http://warrenjonesphotography.blogspot.co.uk/2014/04/hdr-blended-images-resolving-exposure.html
Image 2
As I
continue at the rooms from my cameras perspective I cant start to understand
more the challenges presented to estate agent photographers and particularly
the camera sensor, it almost shouts at me what do I do here, help me out. The
Lounge presented a similar challenge
where exposing for the room would blowout the light coming through the French
doors else exposing for the French doors would underexpose the room. In this
particular challenge I’ve felt the overexposed light from the right actually
gives the appearance of bright light entering the room and giving a much more
pleasant feel. I’ve boosted the ISO to 500, spot metered the snooker table as I
felt that would give a better average exposure across the room, excluding the
light coming through the doors, this can be seen in the large spike at the very
right of the histogram.


Compositionally with my estate agent hat on I feel I could
have experimented more with different options regarding composition giving me
more options to consider as part of my post processing workflow to help decide
which gave the better appearance to prospective house purchasers.
Image 3
From my
experiences so far I knew my next room, the bathroom would present a number
challenges regarding the white tiling, bath and sink and the bright light that
would be coming through the room. I realised that the camera would have trouble
exposing the room correctly and also having problems with the light streaming
through the window. My eyes, as in the other scenes is much more adapt and
processing the scene. Again as with the images before attempting to adhere to
my self imposed brief acting as am estate agent photographer I’ve continued to
expose the room to give a light and airy feel and allowed the window to over
exposure giving the feeling to viewers
that the room gets good light. The histogram reveals the amount of white
in the image and particularly the over exposure peak at the right of the
histogram.
This is a small
room, not much longer than the width of the bath. I’ve tried multiple compositions
but the low vantage point in landscape and this gives a feel that the room is
much bigger than it is. This in itself is perhaps a dilemma in photography
where even with no post processing I have perhaps created an image that is not
itself 100% reflective of reality using the UWA lens. However as the estate
agent photographer my job is to encourage viewings, I understand the potential
purchases will only but have seen the house themselves so from a morality
perspective I am unconcerned in this instance.


I've realised the scene could be difficult for the camera to
expose and also for me to get a hand held image without camera shake. I've set
the ISO to 640 giving me a shutter speed of 1/100 and then I have spot metered
on the white tiles. As detailed above I was aware that this would over expose
the window but this is compensated by the image of the bathroom feeling very
light and clinically clean.
Any backlit scene, whether in direct or indirect light
Backlighting
can give the photographer both challenges and creative opportunity. In this set
of 3 images I’ve attempted to express my creativity in taking the opportunity
of using backlighting as part of my images
I’ve
decided for this second set of images to use auto white balance
Image 1
Strong
backlighting can impact the final image. Many amateur photographers taking
holiday snaps are often disappointed when viewing the images where backlighting has impacted the camera’s exposure. Of note portraits of people
against either bright backgrounds reflecting light or against the prime light
such as sun and find the subject is in silhouette or facial features are lost
as they are under exposed.
In this
image if I matrix metered then the camera would likely expose for the larger
area of space and light coming through the windows and would leave features of
the flower in shadow. I’ve chosen to spot meter the flower and as a result
should expose the flower correctly and blow out the background to create a high
key image.

I've used a 50mm f/1.8 wide open to put the background out
of focus and used spot metering to also blow out the background metering and
focusing on the stamens of the flower. The histogram has confirmed this with
the far right of the histogram confirm over exposed elements in the image. When
I viewed the histogram in the camera LCD I thought I had also correctly exposed
the low lights but the histogram shown in my post processing software suggests
I could have underexposed 1/3 or 2/3 of a stop as I have lost detail perhaps.
In instances where I would have not had the chance to retake the image I would
have considered using bracketing to either creating a HDR image or the more
likely increase my chances of getting a better exposed image that met my
pre-visualisation.
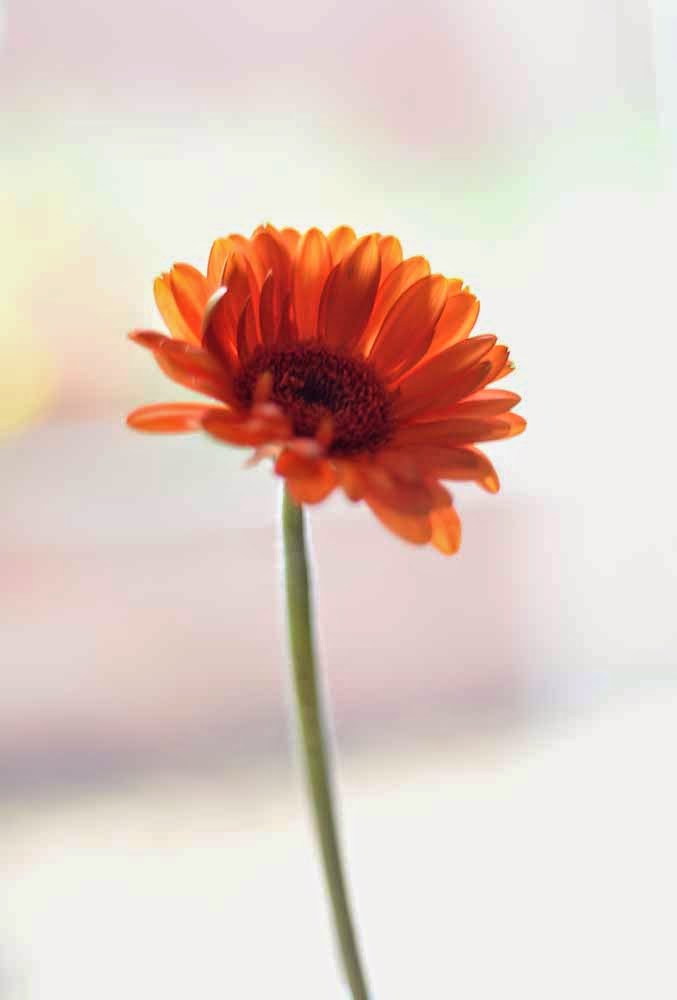
Image 2
In this image I’ve created an abstract
image of a ceiling lightshade shooting toward the window with natural light
reflected from the white ceiling but aiming my camera upwards toward the
ceiling. In this instance I’ve matrix metered on the inner sleeve of the light
shade visible through the top centre hole perforation in the light shade. This
has as expected correctly exposed the ceiling and underexposed the brown felt
of the lampshade. This is reflected in the histogram confirming that for the
majority of the image, the brown felt, the camera feels the image is under
exposed but has instead resulted in what I intended. Had I matrix metered the
white circles would have been less light and not as contrasting as I have
created. In addition using an aperture of f/2.8 and focus on the top centre
whole of the shade I put the bottom of the image out of focus. I’ve also tilted
the camera to create the lines of circles in a more diagonal and dynamic way.
This will I feel result in viewers of this image having their eye drawn along
the diagonal line through the image to the in focus hole. I’ve used an ISO of 500 to ensure I get a
faster shutter speed to avoid camera shake from the image. The histogram tells
me that it is a dark image and had I been able to post process, bringing in the
slider from the whites to the left to the start of the histogram incline on the
right I would have created a more contrasting image.


Image 3
3a
An image typically reflecting springtime
with the fresh and bright yellows. Sometimes images need to capture the whole
of the subject but they can also be creative when they capture part or are made
to dominate the frame. This image is backlit shooting almost directly into the
sun with a wide aperture of f/3.5 to create a narrow focus on the around the
stamen of the flower putting the background and elements of the flower out of
focus. The white balance was set to direct sunlight and in the strong morning
sunlight this has retained the natural light colour.
The histogram shows a dynamic range
greater with light and dark clipping as shown at the extreme ends of the
histogram. Shooting almost directly into the sun will risk over exposure and
where attempting to limit this, then darks will by the same token be under exposed.

3b
I also took the same image with the white
balance set in the camera to shade to see what effect this would have as some
elements of the flower are in shade. However from the small image below the
colour rendition is incorrect in terms of what my eyes recorded and also
appears unnatural.

3c
Here is the image from 3a in a larger size
taken (with the white balance set to direct sunlight in camera)

A scene with strong incident dappled light
For the 3rd, and also the 4th, situation I have
used a preselected white balance option for most images. From TAOP I recall how light is
measured in colour temperature and my camera manual (who reads these end to
end - I should J) details this quite
succinctly:


Using White balance adjustments is the process to remove
unrealistic colour casts captured by the sensor. This will ensure that say a
colour seen by the photographer as white, if required, are adjusted to look
whote also in the final image. A classic example of this is images taken of
snow where the camera will record the snow as a grey white rather than the
white seen by the human eye
In my experience selecting auto white balance will for the
very vast majority of time correctly adjust the white balance for the jpeg image.
Personally I prefer to create RAW images and adjust manually when viewing the
RAW image to meet what I feel either matched what my eyes saw and perhaps a
creative adjustment. The WB presets are fixed adjustments and unlikely to meet
the photographer’s requirement each time can certainly be used when
understanding exactly what the camera will do for these preset adjustments.
Using a grey card to measure the light actually at the
scene, not in advance in say the home, could help set the correct white balance
adjustment required for the camera in that particular circumstance.
Image 1
I've selected a white balance of shade, sun light is from the right and though I’ve
used matrix metering it hasn't correctly exposed the tree trunks which,
particularly for this on the left nearer the light, are put almost into
silhouette. This can be effective if wanting to contrast these silhouettes
against the brighter sky but if not might be a prime candidate for multiple
bracket exposures on a tripod with a
view to create a high dynamic range (HDR) image. The WB shade option has I feel
made the image warmer in colour temperature (e.g. its increased the colour
temperature of the image

Image 2
This next scene
with strong incident dappled light was taken “contre jour” against the light
source with a white balance of shade since in the shade the light would appear
cooler in the shade. This has also been matrix metered and has exposed
surprisingly well given the very difficult conditions. Unlike the previous
exercise in this instance I feel the captured scene does almost reflect what my
eyes saw. The trees filigree is scene in silhouette and perhaps with the sun
out of the image this could be a more effective image. It is always fascinating
how silhouette shapes change subject to the height and strength of the light
source. Again this is another idea for the future which can be used creatively
in photography.

Image 3
Taking this image
from a low vantage point gives the appearance of a steeper hill than it was.
Should I have been taking this from an Estate Agent perspective I may well have
wanted a higher vantage point for the camera to help “flatten out” the slope
and give the appearance of it being more pedestrian friendly. Using the shade
WB option has had mix effects here as I feel the colour appears more washed out
than how my eyes recorded it. In post processing this image I would have
improved this but as with all my images for this assignment they are
unprocessed and straight out of the camera. The window of the house far left
appears over exposed, its in direct light and reflecting this. With mixed
lighting of direct and dappled in the image this can be difficult capture
correctly. The camera histogram when I checked this had an even low look but
with tall spikes at 0 and 255, the window clearly creating the 255 spike and
the dark building halfway up the in the far right third of the image is no
doubt creating the 0 spike (see the second image)


For the
lighting heading on ‘dapple light’ this was one of the strongest sections in terms
of experimentation and learning. The result you got from your cameras ‘matrix metering’
has in this case given a mixed result. Your reading of and subsequent comments
on image #03’s histogram was great, this is the most ideal tool to ascertain
exposure in a DSLR. Earlier on you referenced Ansel Adams and the ‘Zone System’,
this would be a great technical exercise to conduct in terms of your metering/exposure
skills. The suggested blog post may be suited as a technical comparative where
you examine the zones in relation to the histograms level scale of 0-255,
perhaps make a measure of where each of the zones would fall on that
scale.
Thanks. Yes that is a good idea and I've since performed some investigation and have indeed written on where I think the Zone system fits in with digital photography and on the histogram. Here is my blog entry:
http://warrenjonesphotography.blogspot.co.uk/2014/04/ansel-adams-and-his-zone-system-within.html
Indoor scenes illuminated by a single source of
artificial light
Image 1
I’m continuing my
theme for the indoor images as if I’m taking images for the Estate Agent. For bedroom images perhaps the choices to
create are large and airy or warm and cosy. Given the brief in this instance is
to use a single lamp then warm and cosy being reflected in the image for the
viewer to experience seems the correct choice. I’ve taken the images at around
7pm on a Spring evening so there is some light still outside. I’ve selected matrix metering as this seems to
get it right 99% of the time and I don’t believe I need any one object
specifically metered and exposed for. I’ve
set the white balance to Tungsten and initially set an ISO of 500. The
histogram tells me I’m under exposed slightly and the shutter speed set by the
camera in response to my aperture of f/4.5 is 1/4 of a second which is too slow
for handheld and I can see some camera shake in the image zooming in on the
camera LCD. However the WB setting of Tungsten is setting the colour
temperature to that which matches what my eyes captured.

I've boosted the
ISO to 2000 to increase the shutter speed and avoid camera shake. The histogram
looks similar to the image above and shares the
same clipping at the darks and lights due to I believe the blacks under the bed
and the whites of the lamp light.

In my final image
I’ve adjusted the lamp and pointed it at an unseen mirror opposite it on the
right of the frame to bounce light around the room. I’ve also reduced the ISO
to 1600 using the same settings as previous. This has increased the lighting in
the room and lightened the image. I feel I have obtained a middle ground in the
image I am happy with now having an image between both light and airy and warm
and cosy and lived in. That lived in look is important. I’ve seen many show homes
that seem clean and somewhat clinical without having a lived in look which I
feel is important when viewing a potential home. The question I would ask as a
buyer, and therefore image I want to give to potential buyers as my role as
Estate Agent photographer, is that the answer to the question: “Could I live in
this house?”. I want that answer to be “yes”
for as any people who view the house Estate Agent images. This would be on the
premise the more houses the Estate Agent sells and in a quick time would result
in more work for me in the future.

Image 2
A small closet
type toilet with sink - how do I maximise the appearance of space in such a
small room? I’ve changed the camera orientation to portrait and used the fact
that the height of the room is longer than its length, using an UWA lens I feel
I’ve maximised the space in the best way I am able.
I’ve set the WB to
tungsten and set the ISO to 1600, used the aperture of f/4.5 as I used before
and the camera has set a shutter speed of 1/60 which I feel is OK to avoid
camera shake. I’ve pulled the blind down to avoid overexposing the light and
the histogram suggests the exposure is OK with some high light clipping from
the light:


Image 3
One of the
bedrooms, following an extension home improvement is long and thin, the bed is
a 1.5 times single standard bed. A view from the doorway halfway down the room
would not make the best viewpoint for the room. I’ve drawn the curtains to
avoid over exposure of the light from the window and put a single light on at
the far end of the room. The room walls are white and using the tungsten WB
setting this light temperature captured seems correct. With daylight this could
have been captured in a confused way.
The camera position at one end maximises the length of the room and the
black borders at the top of the walls create dynamic diagonals in the image and
good perspective. Whilst the room is narrow, I’m trying emphasis its length and
encourage the viewers of the image in the estate agent perspective to consider
a house viewing. I would think that many prospective buyers easily dismiss
house viewers based simply on some room images where sufficient thought may not
be put into the image capture to maximise the property.
The length of the
room with a single light has given me lighting problems and getting a shutter
speed of sufficient value to avoid camera shake. Whilst I could have used a
tripod I’ve instead used the features of the camera to assist me. I’ve
continued to raise the ISO until reached a shutter speed where there was no
camera shake in the image.
On a full frame
camera the rule of thumb is:
Min Shutter Speed (secs) = 1/Focal Length (mm)
My
focal length for this image is 16mm so ideally I should have boosted the ISO to
allow a minimum shutter speed of 1/16 to avoid camera shake. Of course using
high ISO can cause noise issues. In the end I settled with an ISO of 8000
obtaining a shutter speed of 1/13 to get what I felt was a good all round
balance. The histogram suggests a slower shutter speed would have given a
better exposure as I’ve lost shadow detail. The highlight clipping no doubt
again is the light bulb. Photography can sometimes be about compromise and the
camera LCD histogram and image suggested the exposure was OK, but not perfect.
Under the lighting conditions I felt the final image could be acceptable

There
is noise in the image and I feel I could have removed this successfully, or at
least reduced its appearance in post processing.

I did think
that the image #03 for the section on ‘indoor scenes illuminated by a single
source of artificial light’ was slightly cold in terms of colour
temperature.
Yes, it does appear cold. This high;lights perhaps one of the photographer's conundrums, should he aim to capture an image that reflects what he saw or should he adjust the image, either in terms of presetting white balance in pre-processing or adjusting it in post processing.
The Bedroom, at the request of Ben, was decorated with black and white paint and a grey carpet so does indeed appear cold also in reality. This is on contrast to Image 1 in this set of our bedroom where the colour scheme, and I hope my capture, reflects a scene of warmth. They say the camera never lies but it can be instructed to capture differently from what the eyes may see
Assignment Part 2
The second part of this assignment requires me to to
select of the 4 situations above in Part One and think about the lighting
conditions and what they should or could be to reduce the contrast in the scene.
I’ve gone back to the images I took for Indoor space in which the only available light is
strong natural window light.
The scene for image 1 created me problems due to
the light coming from the window on the left of the scene and creating shadow
on the dark floor. I tried initially using a remote flash place low aimed to light
up the darker floor areas. The image below was the best of those I took where I
have also used a WB of Flash and an ISO of 1600. I wasn’t happy with the flash
reflection, even though I used a diffuser and some of the shadowing it created.

Switching
on the overhead lights and boosting the ISO I've been able to get even lighting
of the floor combined with the natural light from the window on the left of the
scene.

This assignments part two has been quite
successful resulting in some good results and technical skills in the execution
of the correction task. In the kitchen scene the shadows have been dramatically
reduced yet with the overhead lights the white balance has shifted
quite a bit with a magenta cast evident in the highlight/mid-tone area.
This is a good observation and perhaps an excellent example of how presets in camera when shooting jpeg files can have limitations. Had I taken this image in RAW and outside this assignment where I am not to perform any post processing, I would have course adjusted the White Balance temperature in the RAW processor to eliminate this. However I should have confirmed this in my original assignment
I've waited for a
day that’s less bright to take an image of the lounge. I've spot metered the darkest and lightest areas of the room and using the same ISO determined
different shutter speeds for the lightest and darkest areas in the room of 1/200
and 1/80 and I have used an ISO of 800 at f/4 in aperture priority. This
suggests only a difference of 1 and 1/3 stops.

I’ve decided to
consider a different view point from the images I’ve taken so far of the lounge
and performed the same spot metering and got the same result. Using an ISO of
1600 and a WB setting of direct sunlight, spot metering the TV and using this reversed position I no longer
have the over exposed windows in the frame and get a more evenly exposed image
as the histogram shows:

The highlight clipping visible in this histogram
for the image on the next page is due no
doubt the sunlit curtain on the left of the scene even though it’s a less sunny
day
This final image
appears better lit with little over exposure giving a nice clean, war, and airy
feeling to the lounge

The final 3rd
image of my retaken set is of the bathroom. Like the preceding 2 images it has
been taken on a less sunny day to help reduce the potential for over exposing
the light coming through the windows. I’ve pulled the blind down lower to help
reduce some of the light entering the room
I‘ve used matrix metering,
an ISO of 500 and a white balance of shade. I’m OK with histogram, though some
highlight clipping has occurred as a result of the light from the window.

However I’m not happy with the light
temperature in the image as this has given an off white colour to the white
tiles, see below:

Using the same exposure settings I’ve adjust ed
the WB setting to Auto. Whilst similar to the original image, waiting for less
sunlight has made for an improved image in terms of lighting and less over
exposure in the contrasty scene

Key Learnings
a)
I think Auto White balance on modern
camera’s is very good and appears to gauge the correct light temperature
setting to use very well. Unlike RAW files where the photographer can set a WB
setting and fine tune it, with jpegs the camera is deciding but I think this is
far more reliable than perhaps even than experienced photographer
b)
Matrix metering again in modern digital
camera’s is right in probably around 95% of scenes. Spot metering may allow the
photographer to gauge exposure for brightest and darkest elements in scene,
calculate the difference in stops and understand if the camera’s sensor has a
dynamic range is capable of recording this. If not the photographer can make a
decision regarding which element he exposes correctly. Exposing highlights
correctly could allow more detail to be recovered in the darks in post
processing (as against the opposite) and perhaps allow a HDR image to be created.
Of course following this process with RAW files will allow much more detail to
be captured in the under exposed areas. Spot metering can allow for a specific
element in an image to be exposed correctly. This could be important for people’s
face or photographing a sunset putting foreground into silhouette against it
c)
Increasing ISO allows faster shutter
speeds to be used and avoids the need for flash and tripods. Some shooting
conditions simply do not allow flash or tripods, this is often the case in
Churches where flash may be forbidden during the ceremony yet the Bride and
Groom will want this element to be captured. Modern digital cameras have good usable
ISO range, I’ve seen that I can possible get up to 8000 with little noise. I
will experiment more to understand to what level I can reach and with noise
reduction in post processing result in a clean or acceptable image
d)
Purposely creating HDR images, whilst
can be created from a single image creating a further 2 from the original with
under and overexposed values, capturing these as separate images using exposure
compensation will create better images though will require tripod to ensure the
same scene is framed and captured
e)
Pre-Shoot work flow needs also to take
into account the lighting conditions and where possible wait for the optimum
time. Where this isn’t possible, say for
formal shoots of Wedding where outside light is hard to predict and weather
extremes such as train and wind may result in formal shoots taken indoors. My
recent Wedding shoot in February 2014, see my blog, resulted in both
situations. Having 3 sets of batteries for flash in advance was as a result of
a re-shoot workflow ensuring I cater for all possible conditions
f)
Not relying on post processing images
has made me much more aware of a requirement to consider light and exposure and
of course metering conditions.
g)
For the majority of the images I’ve
attempted to put my thought processes around a job as an estate agency
photographer. Lighting within houses will vary and be subject to the external
lighting conditions prevalent. The photographer will be unlikely to be able to
pre-determine the time and lighting. However understanding the successes I’ve
had though experimentation for this assignment would make more aware and
prepared in advance and would be able to work around these challenges
h) I've not found this from undertaking
this Assignment but I believe the changing light frequency of specific artificial
lighting can cause inconsistencies in images even though the photographer may
use the same settings
Quality of Outcome
You have
presented a very good document for this assignment that articulates
fully your
technical skills. The work is coherent with a nice flow and you have
communicated
some good lines of thinking to possible scenarios. With technical exercises
such as this assignment try to place them into other photographic scenarios,
for example where else might have strong dappled light or where would you want
this lighting effect as a suggestion.
Demonstration of Creativity
There is a
good level of imagination applied to this submission coupled with the experimentation
and developmental aspect, which is quite strong. The resolve may have been
greater if there were some more examples of your technical developments in your
learning log.
Learning Log & Contextualisation
Overall you
have contextualised your work in a very articulate way, which being governed by
the unit is heavily technical. There is some evidence of a range of research
yet this could have been broadened to encompass other lines of enquiry in
support of your work mainly academic based pathways.
Your ‘key
learning’s’ at the end of your assignment make for a good reflective
passage; you
have drawn upon you own experience of being a wedding
photographer
as an example of taking possible lighting scenarios into
consideration,
which is great as even at venues with fixed interior lighting these can
suddenly be different on the day.
Thanks. This was quite a challenging assignment and though initially restrictive in not being able to make any post processing adjustments it has made me consider my photography and "getting it right in camera" is important, least it could save a lot of time when processing multiple images
The brief
line about not relying on post production is a good line of thought;
perhaps this
in itself could make an interesting exercise; whereby you shoot a
scene and get
it right in camera through extra lighting, reflectors, diffusers over windows,
a tripod etc. and then just shoot the scene and rely on post-production to
correct it.
Yes, I have gone back to the particular challenge and used my histogram to determine how many bracketed shots I need to create an image of wider dynamic range than my camera could capture in one image:
http://warrenjonesphotography.blogspot.co.uk/2014/04/hdr-blended-images-resolving-exposure.html
On a
technical note regarding your blog design, would it be possible please to
have the
background white and text black as I find white text on black strains the eyes
after a while.
Thanks for the feedback. I have now improved and spiced up my blog, I hope you like it
Suggested
reading/viewing & Pointers for the next assignment
In your email
you have made a short proposal for your final assignment, it may be good to
submit a monochromatic piece based upon your investigation into Lydbrook.
Typically it is best to stick to either colour or black & white; sometimes
in certain situations mixing the two can work, but I would recommend with producing
the work as a monochromatic piece.
So now look
into these two photographers and examine their monochromatic
work, which
are both quite tonally stunning.
The first is
Michael Kenna:
http://www.michaelkenna.net
The second is
Sebastiao Salgado, more specifically his series Genesis:
http://lightbox.time.com/2013/03/28/in-the-beginnings-sebastiao-salgados-
genesis/#5
Now
explore/research into the work and find out how they were produced, were they
both shot on medium/large format cameras with traditional silver halide or were
they shot on DSLR’s?
In response to an email I sent my tutor around my suggestions / proposals for Assignment 5 of DPP he comments:
Black &
white would be a logical choice for the final assignment, yet as the next chapter
is about processing the image with the end assignment being producing a monochromatic
series, they may be too close to each other. Take note; assignment three does
ask you to bring out the monochrome image qualities of from, tonal contrast and
texture, so not all scenes are suitable for black and white conversion.
Have you done
any HDR black and white work? Perhaps with either assignment 3 or 5 you could
explore this angle; maybe even night-time urban photography
produced this
way would be an ideal conclusion for this unit.